Showing posts with label how-to. Show all posts

Monday, November 18, 2013

Anyone for Macrame?

Who remembers macrame?
Me me me!
I remember pot holders made of macrame (the hanging plant pot holders - not the ones you use to hot cooking pots!) and maybe belts - they were a very 70's thing weren't they?

Now macrame is making a come-back and I am especially liking macrame jewellery - it's bright and fun and funky, from simple little bracelets -

orange bracelet by alexandrajewelryshop

irish knot bracelet by elwynjewelry

To amazingly complex creations incorporating gemstones and other beads -
macrame necklace by mabutirit

I'm very taken by these sweet little czech glass earrings -

beaded macrame earrings by glassdancer

The possibilities for macrame jewellery seem endless!
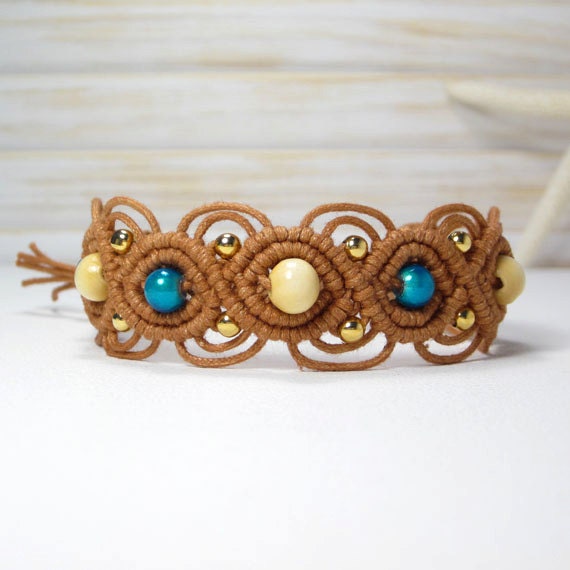

blue bead macrame bracelet by spiritysol

butterfly necklace by spiritysol
Would you like to try it?
Here's a nice simple tutorial for a beaded bracelet - shamballa bracelet on youtube.

Or something a whole lot more complex - but very effective, by beading4perfection also on youtube.

There is a whole site dedicated to macrame patterns (of course there is!) - free macrame patterns.
I was just blown away by the number of different knots there are. It is fascinating.

Making jewellery using macrame is also called micro-macrame, because you use finer threads.

According to wikipedia macrame has been around since the13th century and was first of all used by Arab weavers to make decorative bits and bobs.
It was also a popular craft amongst sailors - something to do during all those long boring days at sea! They used to make hammocks with it, so that was pretty useful.

So - off I go to find some long bits of thread and knot, knot knot away!


Monday, November 4, 2013

Setting up a Packaging Station. How I did it.

I was inspired this week by a post on the Beading Daily blog about reorganising your studio by Anne Vaughan.
There were a few ideas that I could apply to my smaller scale operation but the one that really resonated with me was the packing space.

I don't have a lot of on-line sales, so I'd never bothered to set up my packaging supplies in an efficient manner.

Even though I've been selling on-line for a few years now! - I know I'm a slow learner.
I had tissue paper in one spot, bubble wrap under my work desk, sticky tape, labels, pretty supplies in another corner, envelopes and boxes in the cupboard, business cards and customs declaration in another spot!

How did I do it for so long?


So today I gathered everything together.
This unit was going to be my lampwork spot, but I'm not doing much of that at the moment.
Unfortunately it is the first thing inside the door, so it becomes a dumping ground for anything I can't be bothered putting away, or half-finished projects etc.


Now I still have my glassy bits there and all my packaging supplies apart from the boxes (which I only seem to need once in a blue moon these days - is that due to the exhorbitant postal rates I wonder?)
I'm only using one of the drawers - so there is room for more efficiency!


How do you organise your packing supplies?
I realise I am lucky that I have a whole workroom to myself.
So how do you manage with limited space?
Please share how you do it!

Monday, July 22, 2013

How to - make a jewellery display for yourself.

I'm always looking for great ways to store jewellery.

Here's a great tutorial on how to make a jewellery display from scratch by Tanya from Dans le Townhouse.


Doesn't it look fabulous?
You could hang it on a wall or sit it on your dressing table or a shelf. If you did that then it would also be portable.

It's filled with Tanya's own gorgeous creations. (She is a clever-clogs!)

I'm also thinking that you could repurpose something for the same use - a drawer perhaps?
What do you think?

Monday, January 14, 2013

Making myself a diary cover

Do you use a diary? A real paper-book-type-diary?
I do. I like quite a big diary that I can write all sorts of things in - my photo challenge prompts, shopping lists, "to-do" lists - all sorts of memos.

But I do like to personalise my diary and I usually cover it in something. Other years I have used those big squares of scrapbooking paper - you know the sort that are so useful as backgrounds for product photos?

But this year, as I have so much fabric that I need to use up, I thought I'd stick some fabric on.

In the end I actually sewed a diary sleeve and if I want to I can reuse it next year.
Good idea, no?


I used some linen fabric that is fairly stiff and wouldn't need interfacing or wadding.
I marked out the corners of the diary on the inside of the fabric.


Just zig-zagged the edges as I thought turning them under would be too bulky.


Folded the ends along the marked line, right sides together.


Sewed along the other marked line.


Turned the ends out.


Ironed it all nice and smooth.
Popped my diary in - and voila!


I like it!
Nice and simple.

Monday, August 29, 2011

Make your own - fabric bunting

I'm sure there are many, many tutorials on how to make your own fabric bunting, but here is one that I came across today and I love it 'cus it uses vintage fabrics as well as some new ones.


You can find how to on Found by Sarah's blog here
Related Posts Plugin for WordPress, Blogger...